🎨 How to Generate a Color Scheme in Inked Colibri
Learn two ways to create color schemes using Inked Colibri - import from Realtime Colors or build directly in the plugin
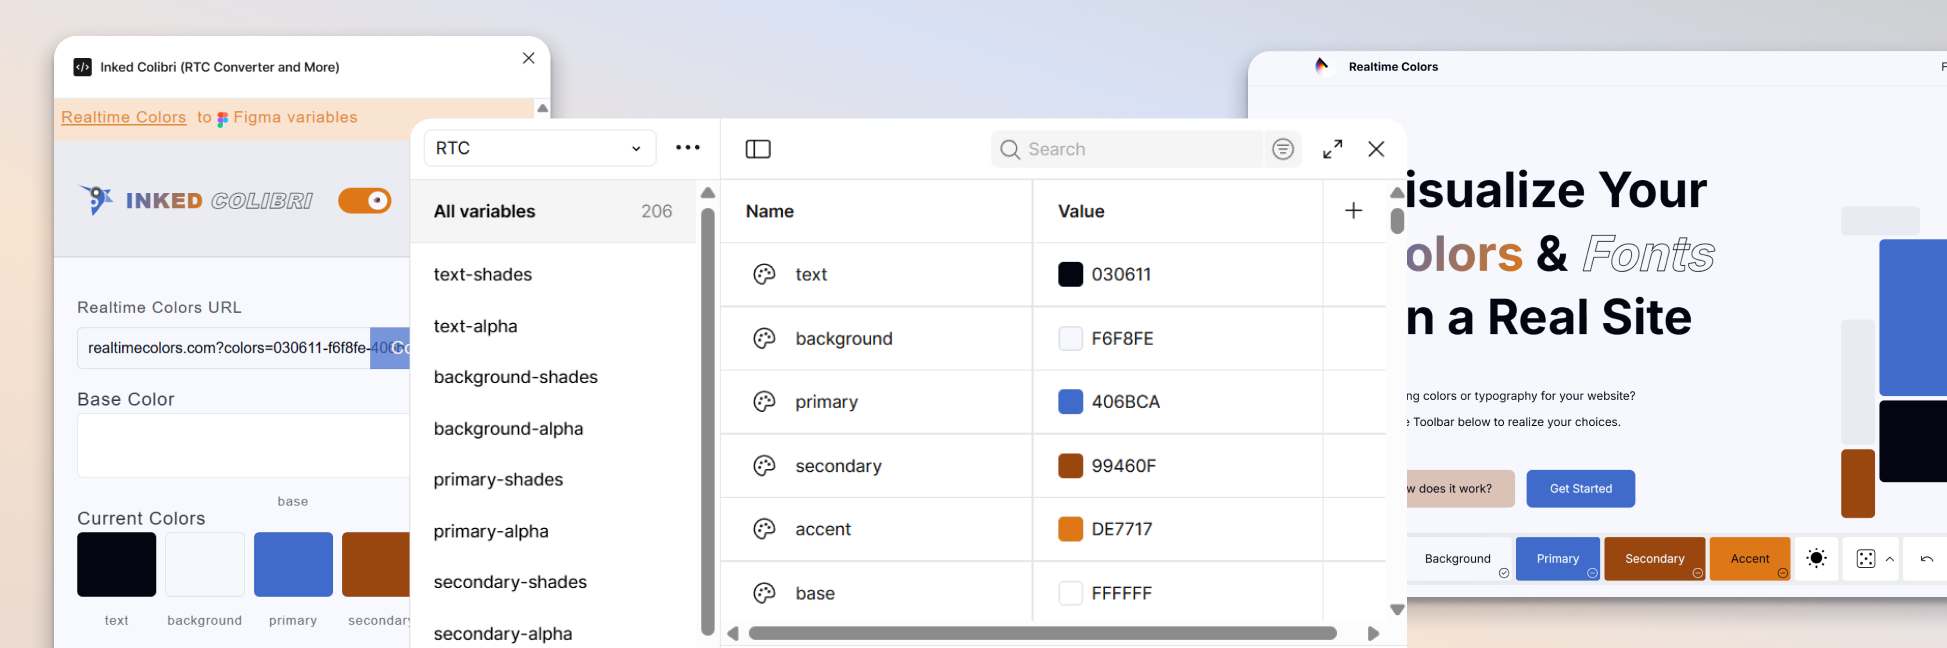
Option 1 — Import from Realtime Colors
If you already explored or fine-tuned your palette on RealtimeColors.com, you can import it directly into Inked Colibri.
Steps
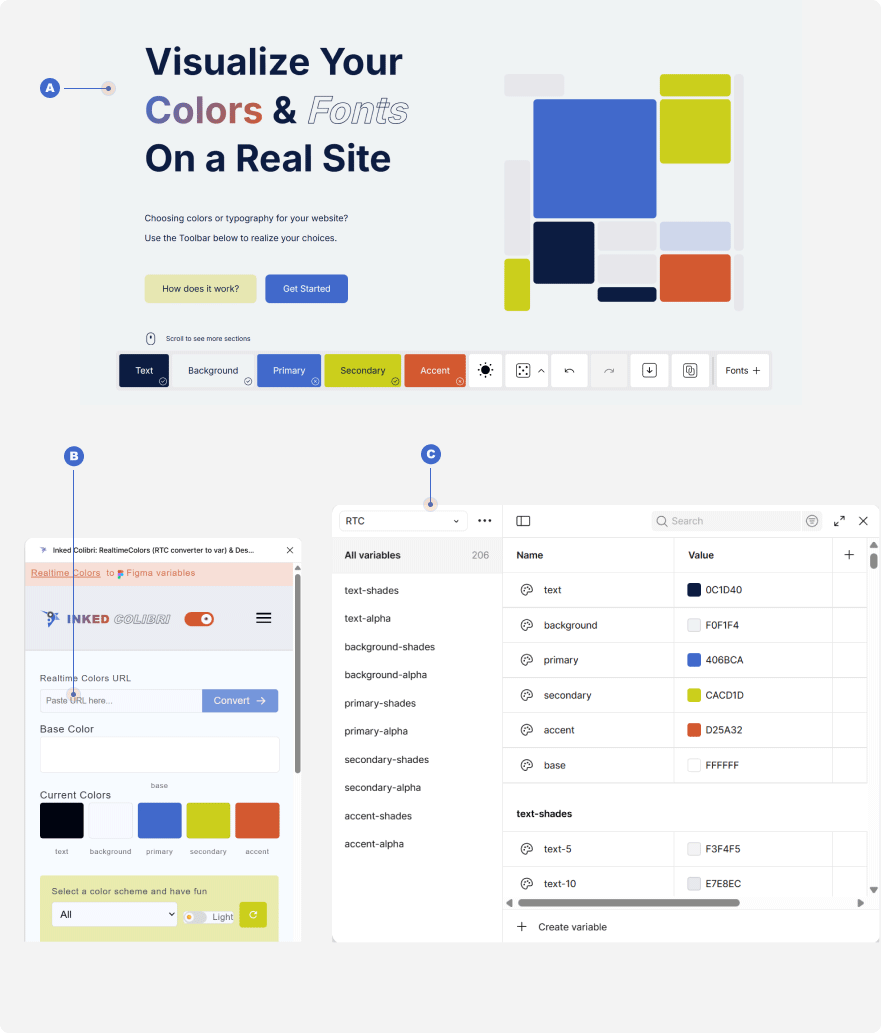
- AGenerate and copy (Press
Ctrl+S(orCmd+Son Mac) to copy the URL containing your color combination.) a URL from RealtimeColors.com. - BPaste the URL into Inked Colibri
- CGenerate the entire system instantly
Option 2 — Create Inside the Plugin
You can also build your color scheme directly through Inked Colibri's interface — perfect when you want to explore palettes without leaving Figma.
Steps
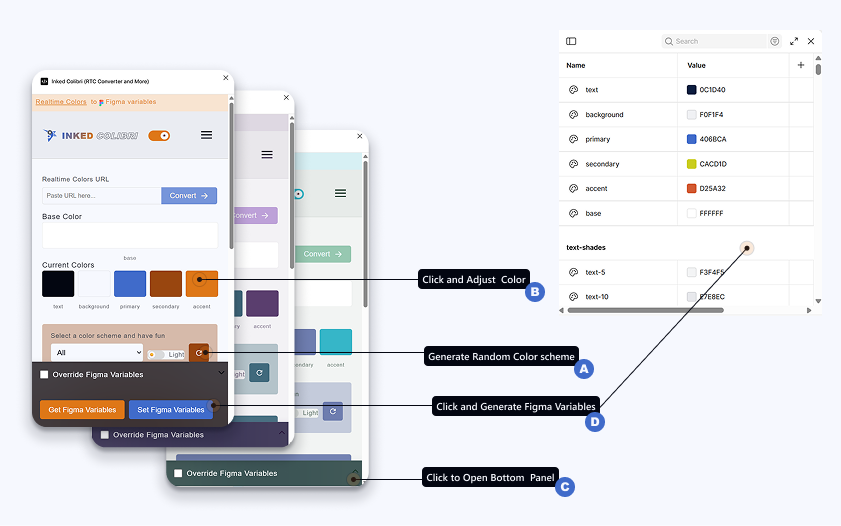
- Open Inked Colibri → Generate Color Scheme.
- Select your Primary, Secondary, and Accent colors using the color pickers.
- Optionally, define custom Text and Background colors if you prefer specific tones.
- Click Generate Scheme.
What Happens Next
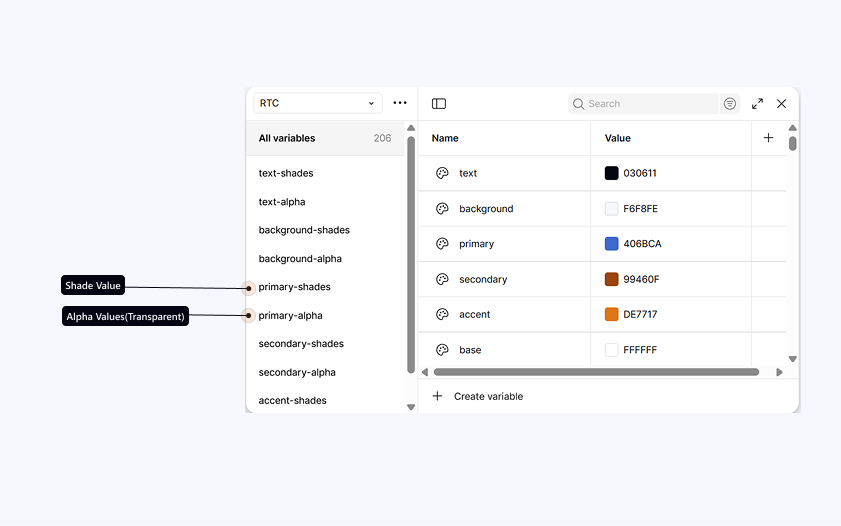
- The plugin creates all shades and alpha variations for each color role (from 5% to 100%).
- Everything is stored under the RTC collection in your Variables panel, following the [color name]-shades and [color name]-alpha structure.
- Your Figma file now has a reusable, variable-based color system that can easily adapt to different palettes later.
Tip
💡 Even if you start with neutral colors, it’s still recommended to go through the generation process. Once your design elements are linked to these variables, you’ll be able to update the entire color theme — including light and dark modes — with a single click.
If you prefer to begin with a neutral palette, you can use the following Real-Time Colors setup:
👉 Neutral Base Palette
Open this link, generate your neutral color set, and import it into Inked Calibri.
Use these neutrals when building your first design elements — this ensures your structure is ready for flexible theming later.
In the next chapter, you’ll learn how to use the generated RTC variable names correctly within your design workflow.